


INTRODUCTION:
In this article, you will learn how to build a Django web app on your Android phone using termux and push it to GitHub while keeping your code secure. If you do not have a laptop, or you need to push your code to GitHub on your mobile phone easily, then this article would be very useful to you. By the end of this article, you would have learned how to install termux on your Android phone, how to build a web app using Django, how to protect your Django secret key in your web app and how to install Git and push your code to GitHub.
First, what is Termux? Termux is an application that runs on android phones. It is a terminal like the command prompt on laptops that can run programs. Django is a programming language framework that is used to build server-side web applications. GitHub is a version control application where you can save your code or documentation, make changes and also collaborate with other developers on projects.
PREREQUISITES:
Here are the prerequisites you will need for this tutorial:
A formal knowledge of Python
An Android phone of version 7.0 and upwards.
Internet connection(because you are going to be downloading packages and you need the internet for that)
STEP 1 - INSTALLING TERMUX
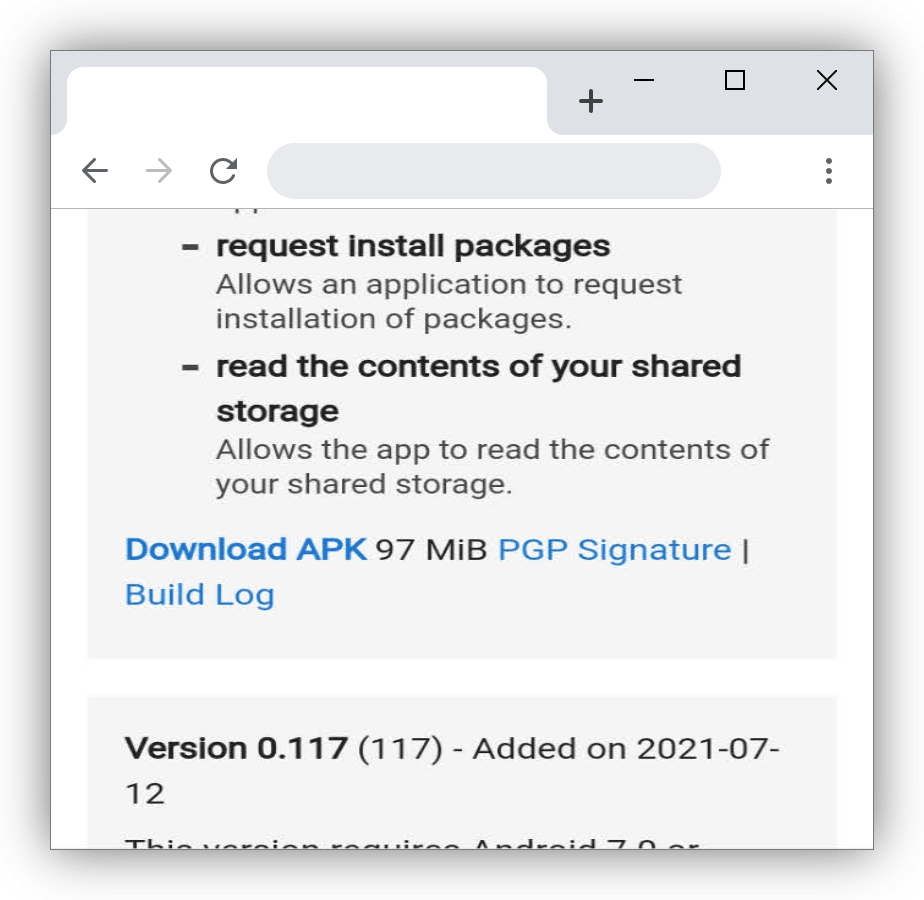
First, you need to install termux. There has been an update and the termux app on Google play store is no longer supported. You can download it from F-droid. When you open this link, click on "download APK" for the first link you see.
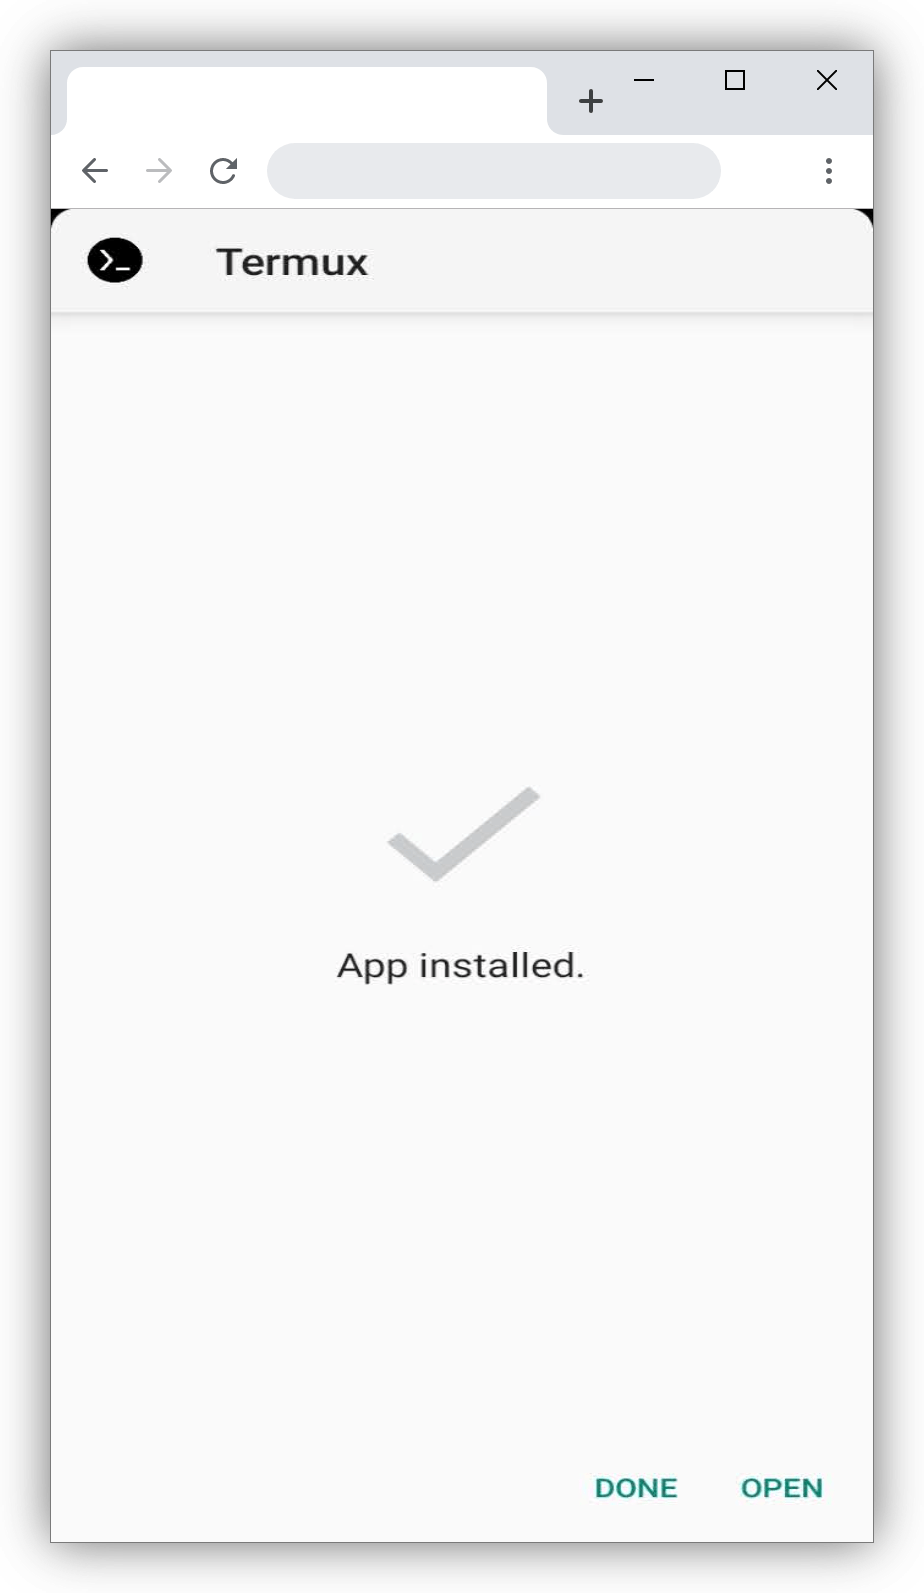
After it has successfully downloaded, you click on the file and it would request for your permission, if you have it set. Grant the permission and the app will be installed.
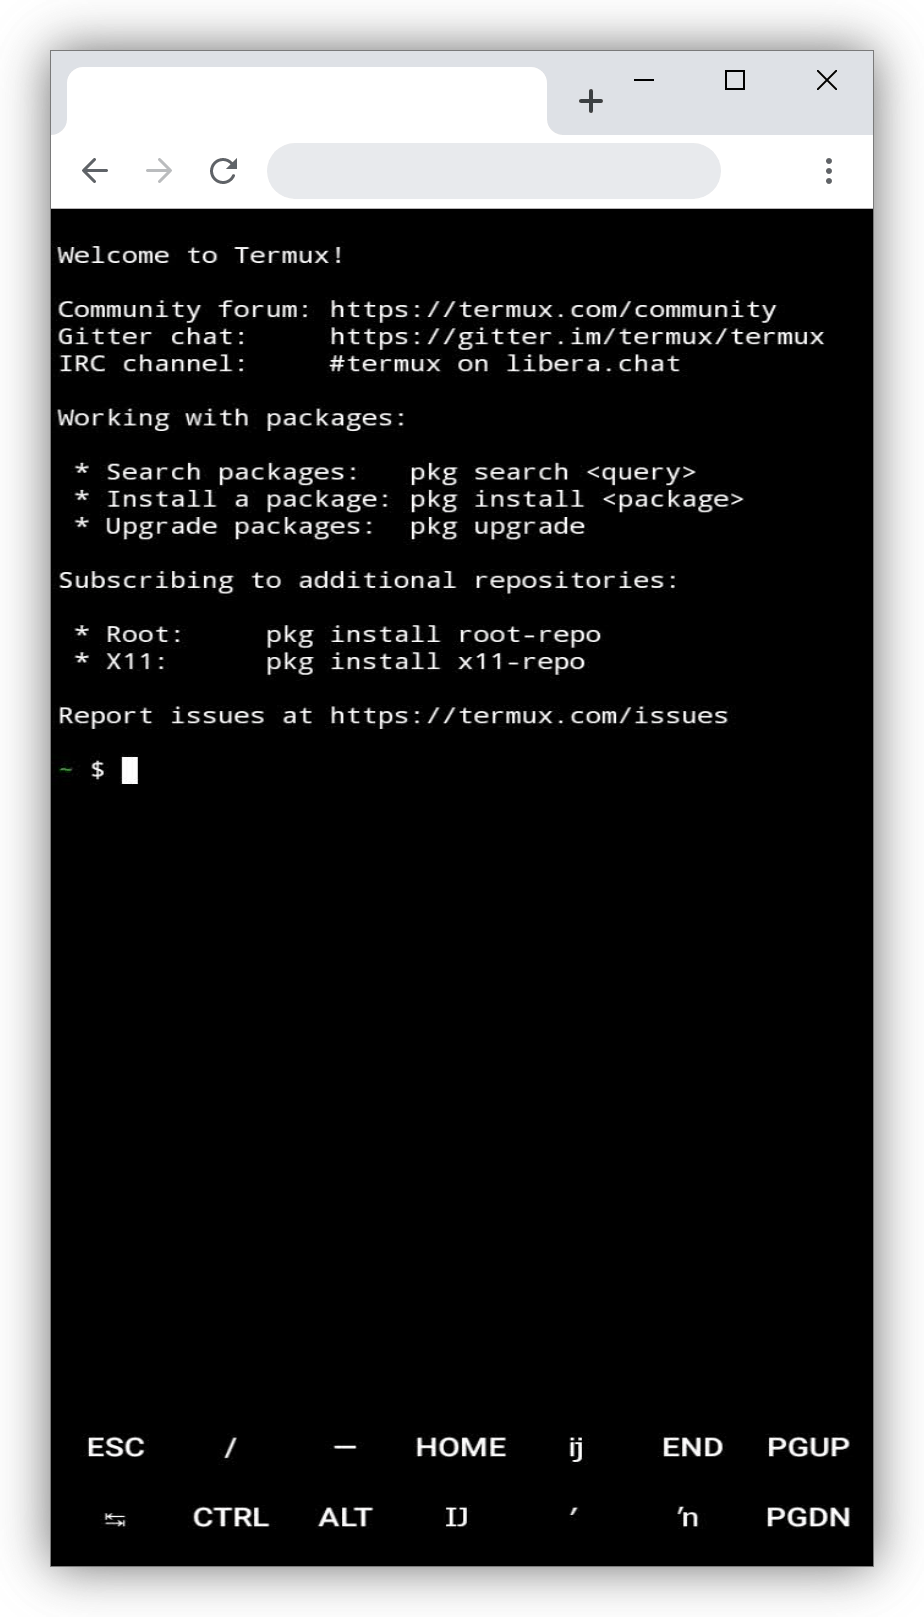
You can open it. This is what you would see.
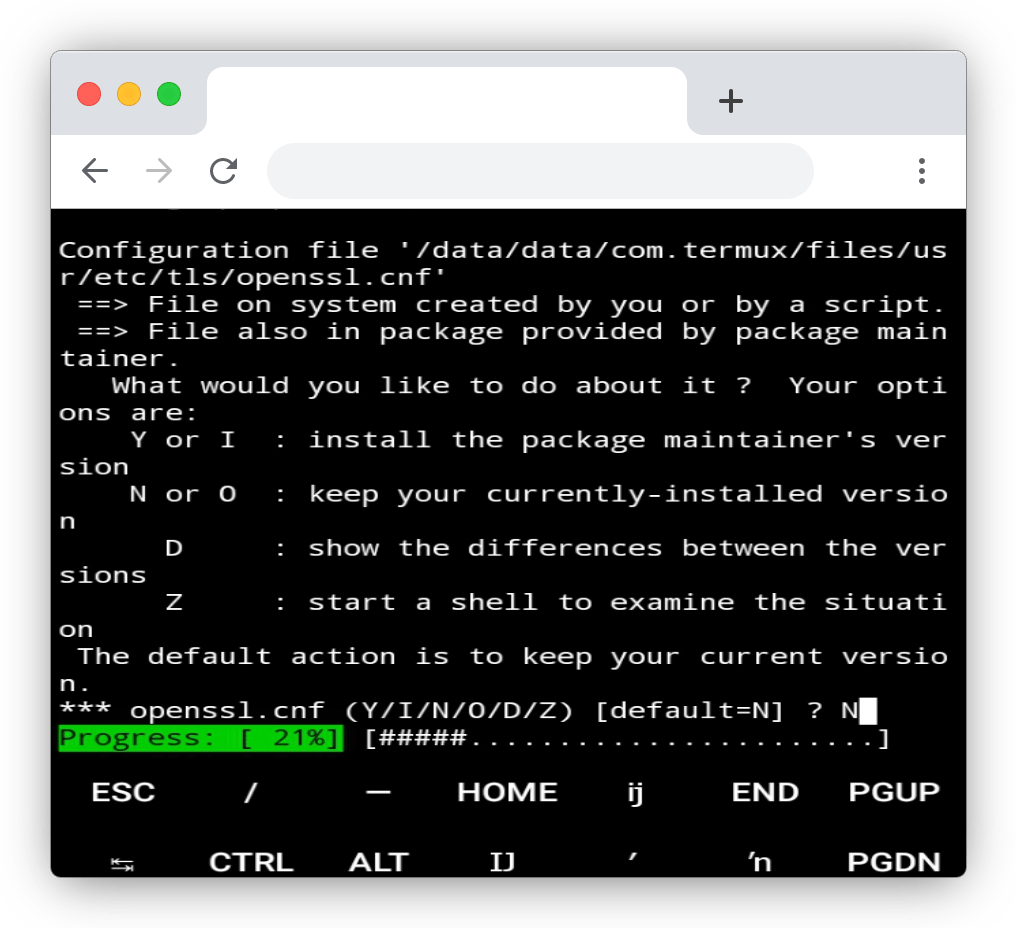
apt update && apt upgrade
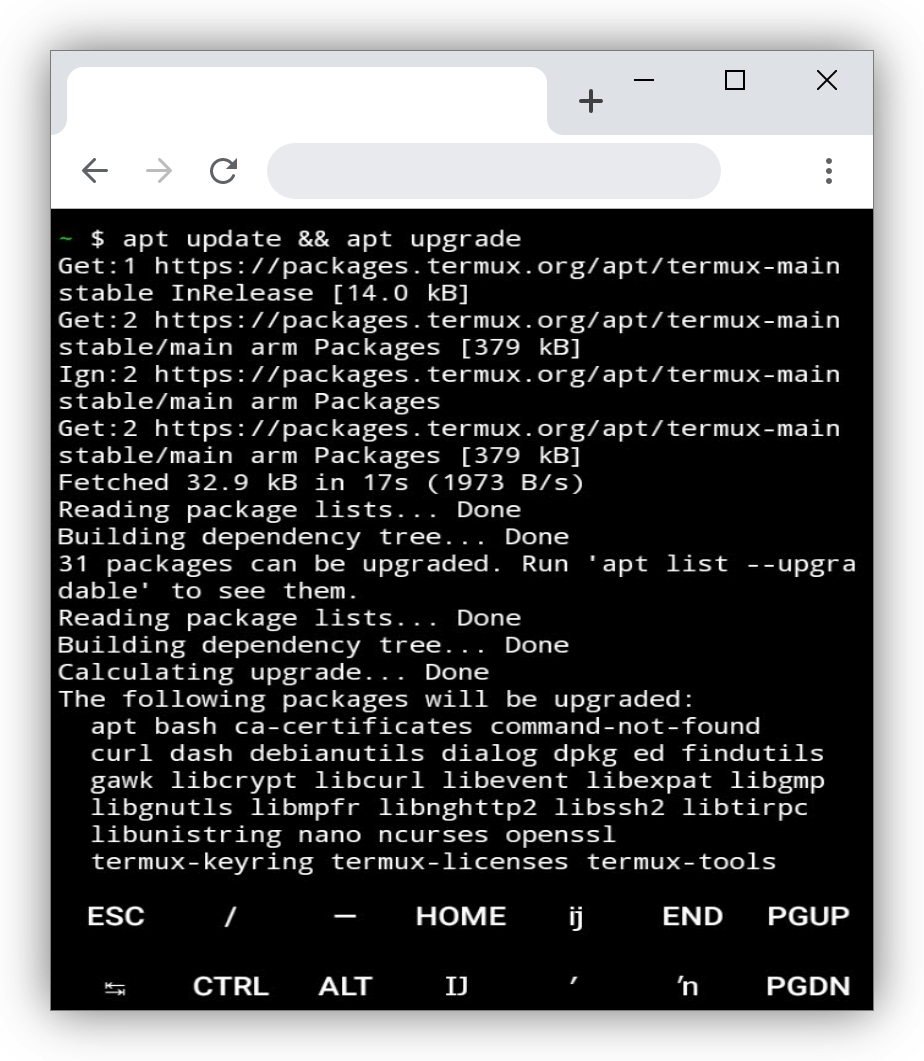
This will install and upgrade all the packages used in the termux app. During installation, type in N, unless you want to configure the app for special use.
Now, after downloading, you need to set up your storage so termux can access your local files and you can save files there as well. To do that, enter this:
termux-setup-storage
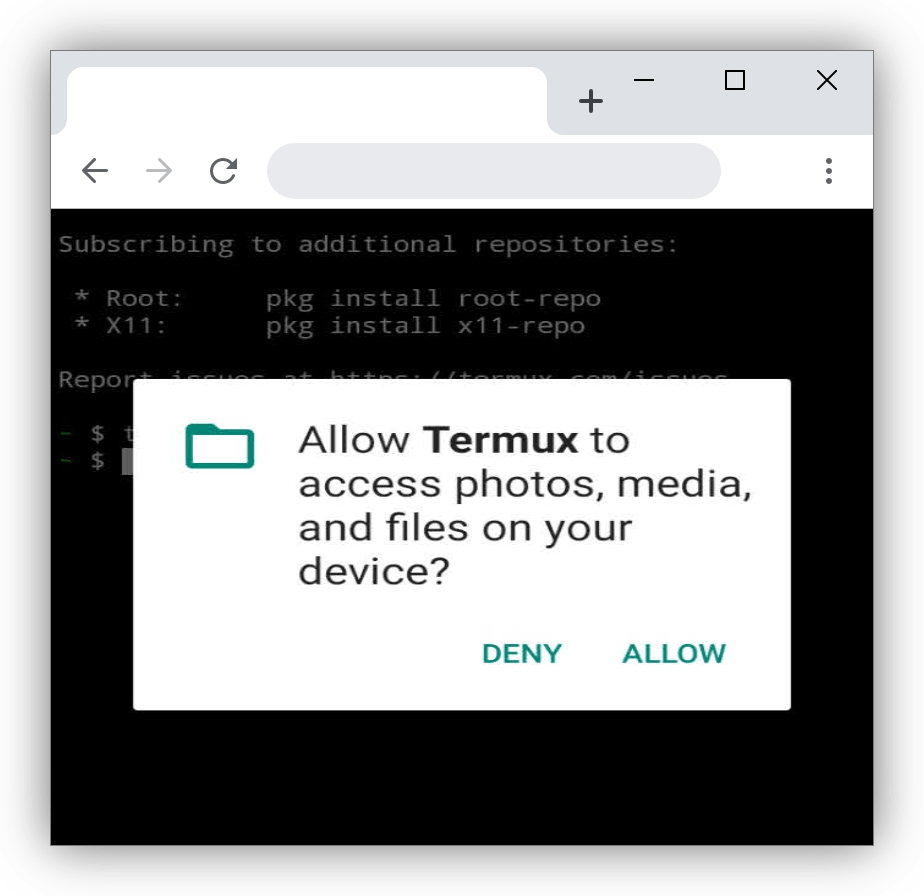
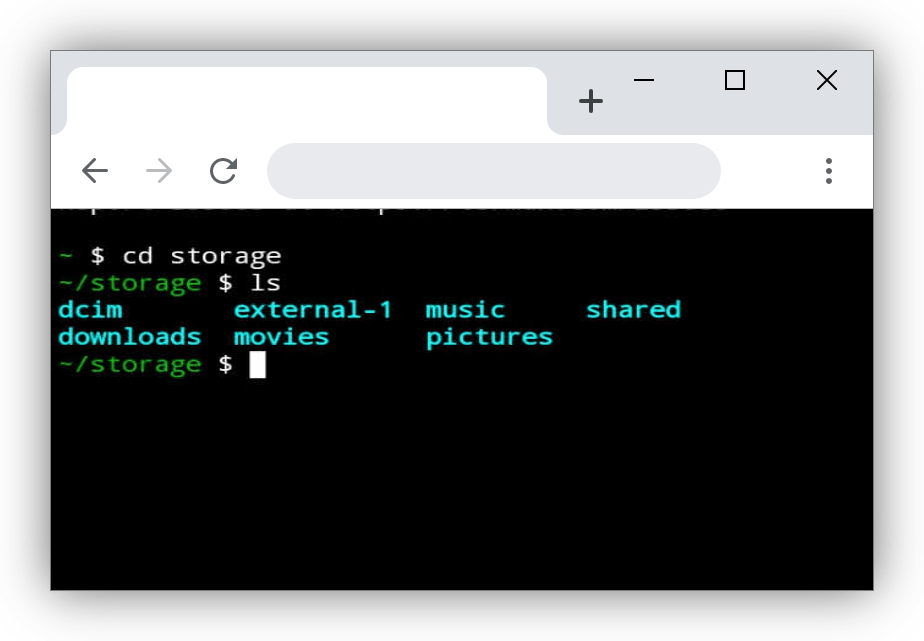
It will bring up a permission box, click on allow. After this, you can check your storage to know the files contained. By entering:
cd storage
This would take you to the storage on your device. You can enter:
ls
This will give you a list of all the files, and folders in your storage. You can cdinto any of the folder and ls to check them out.
Note: if you want to go back to your previous folder or to your root, enter:
cd ..(and press enter)
STEP 2 - BUILDING THE DJANGO WEB APP
Installing Python: To build the app, enter this:
pkg install python
This will install the latest version of python. To confirm that you have installed python, enter:
python
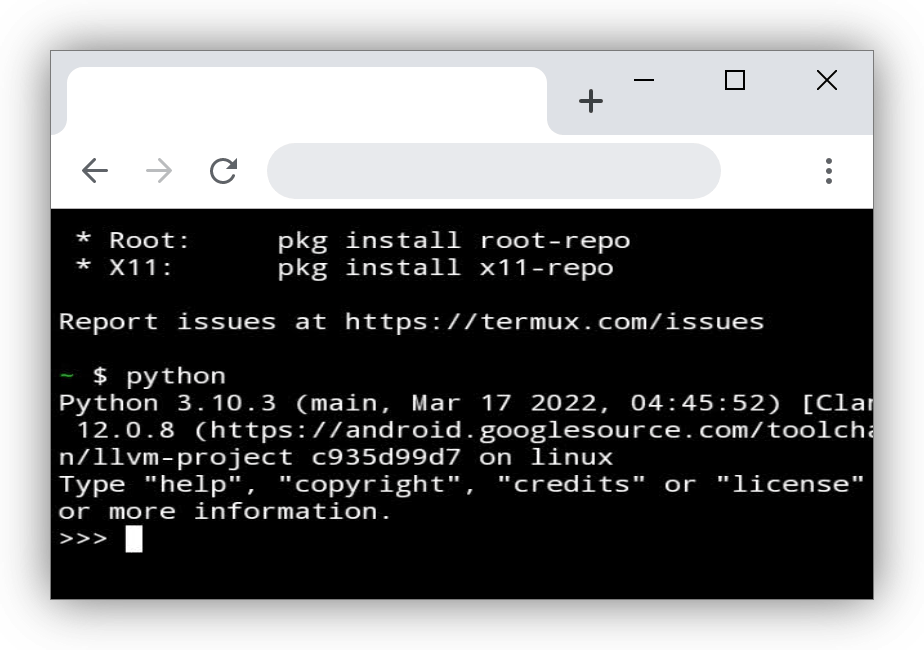
To exit the python shell, press Ctrl+Z
Installing Django:
After that, you need to install Django. Enter:
pip install django

That should install it.
Now, the application is called zicodx_project. You can create this manually by going to the file manager and creating a folder there. Or you can cd to the folder you want and I am choosing downloads in mine. Then, you enter:
mkdir zicodx_project
That should create a folder in the downloads folder.

To confirm, enter:ls
Then cdto the folder you just created and enter:
django-admin startproject zicodx_project .
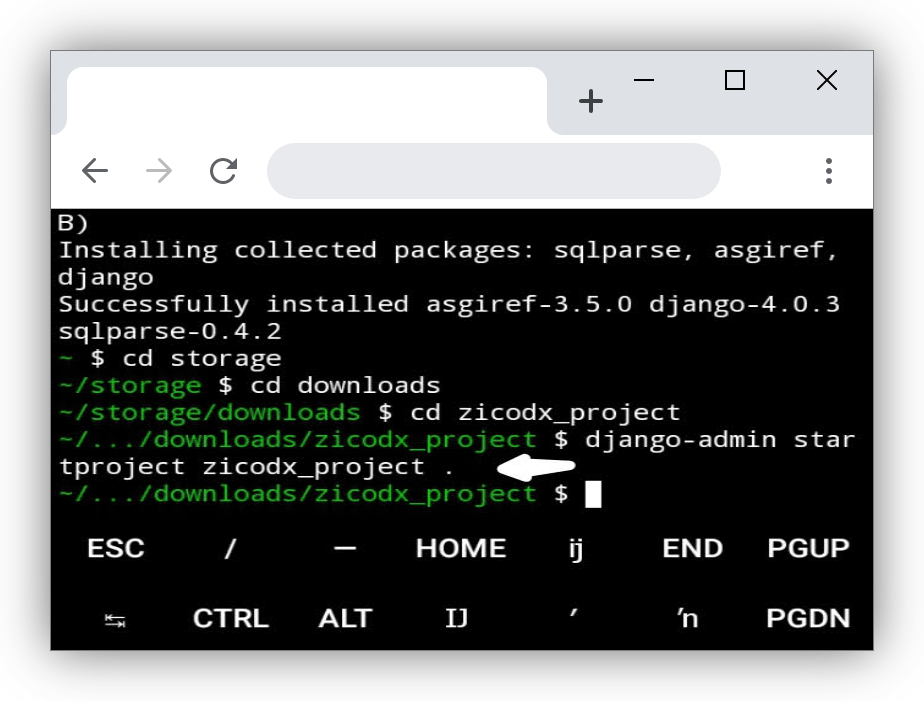
Note:Do not forget to add the dot. That would create a manage.py file in your folder.
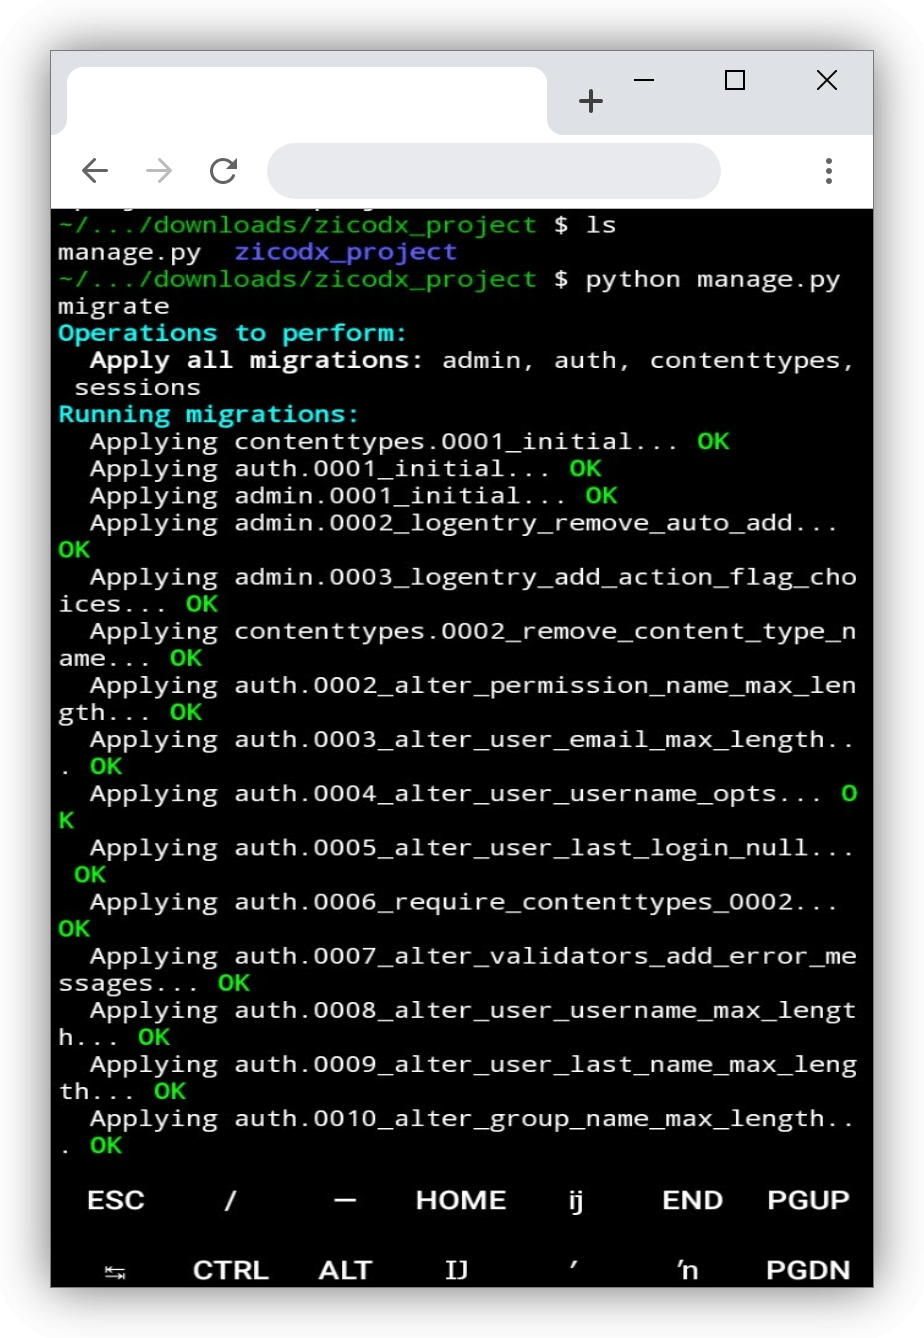
Creating The Database:
You create the database by entering:
python manage.py migrate
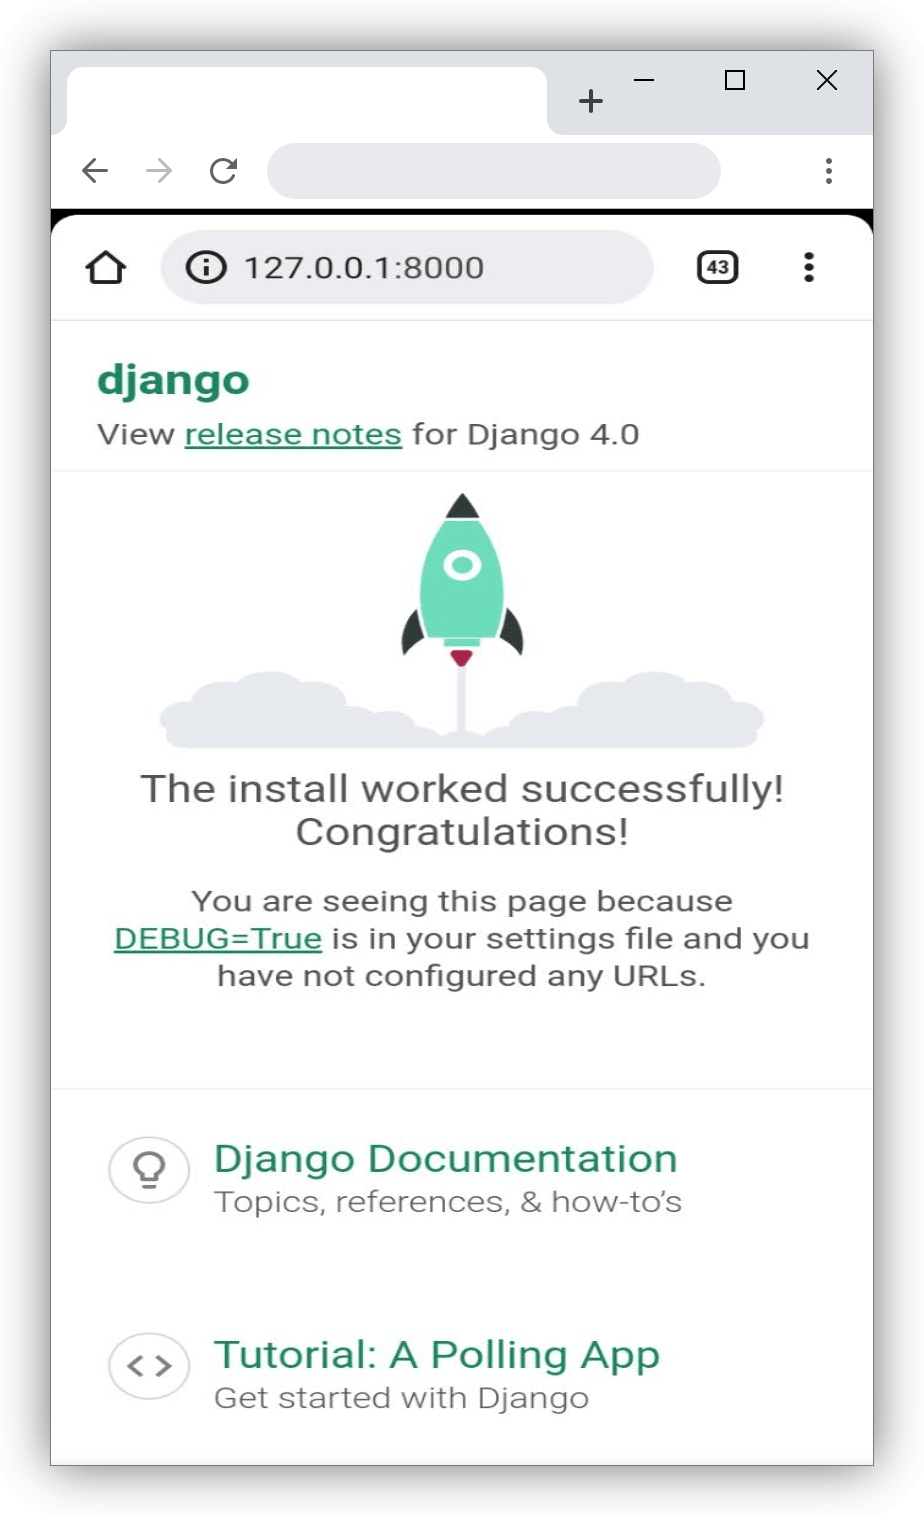
After creating the project, you can view it by entering:
python manage.py runserver
Go to your web browser, type in 127.0.0.1:8000 This will display a default web page rendered by Django. If you are seeing this web page, then the project was successful.
To exit the session, enter Ctrl+C
Creating The App:
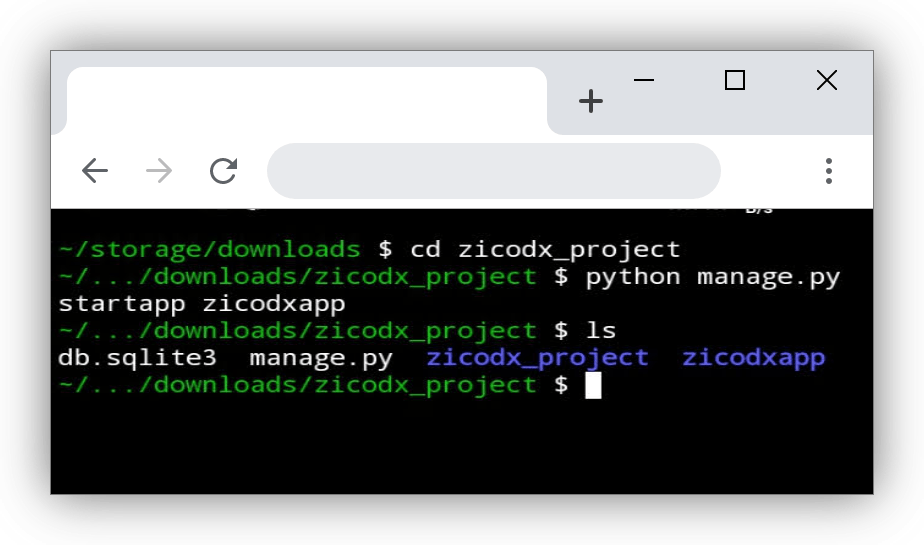
Next is to create an app for your project. This is what will house all the files running the app on the project you created. Enter:
python manage.py startapp zicodxapp
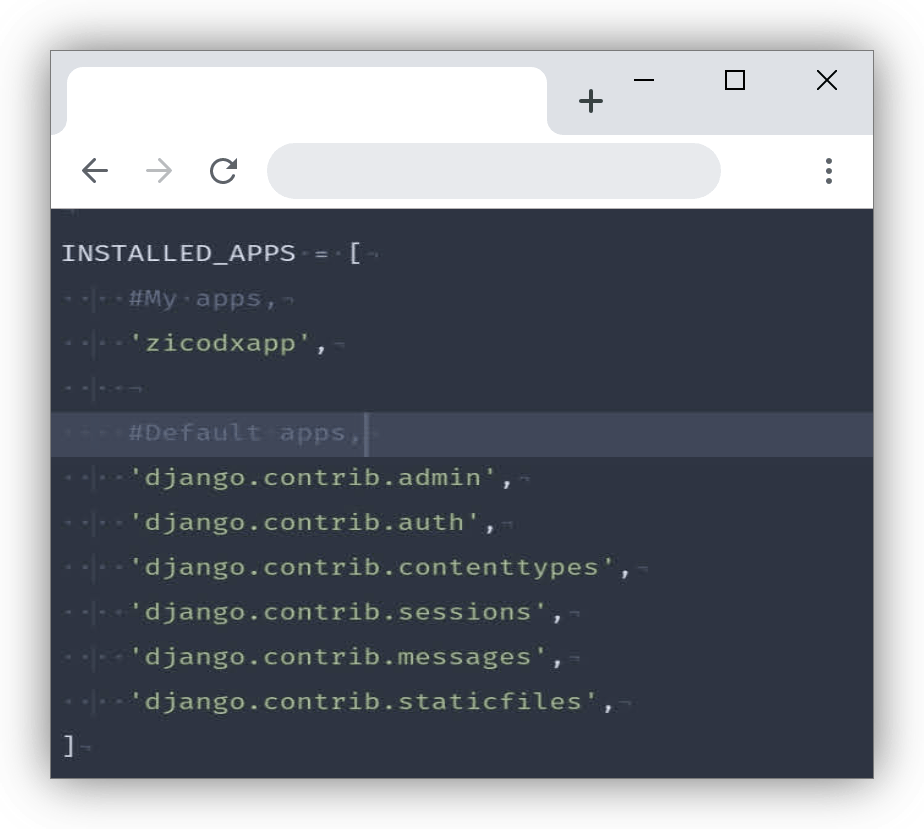
Now, you need to add the app you just created to your settings.py file which is in the zicodxproject. Open the ACode editor or any other editor you installed. Search for the zicodxproject where you saved it and open the settings.py file. Add this:
#My apps
'zicodxapp',

#Default apps
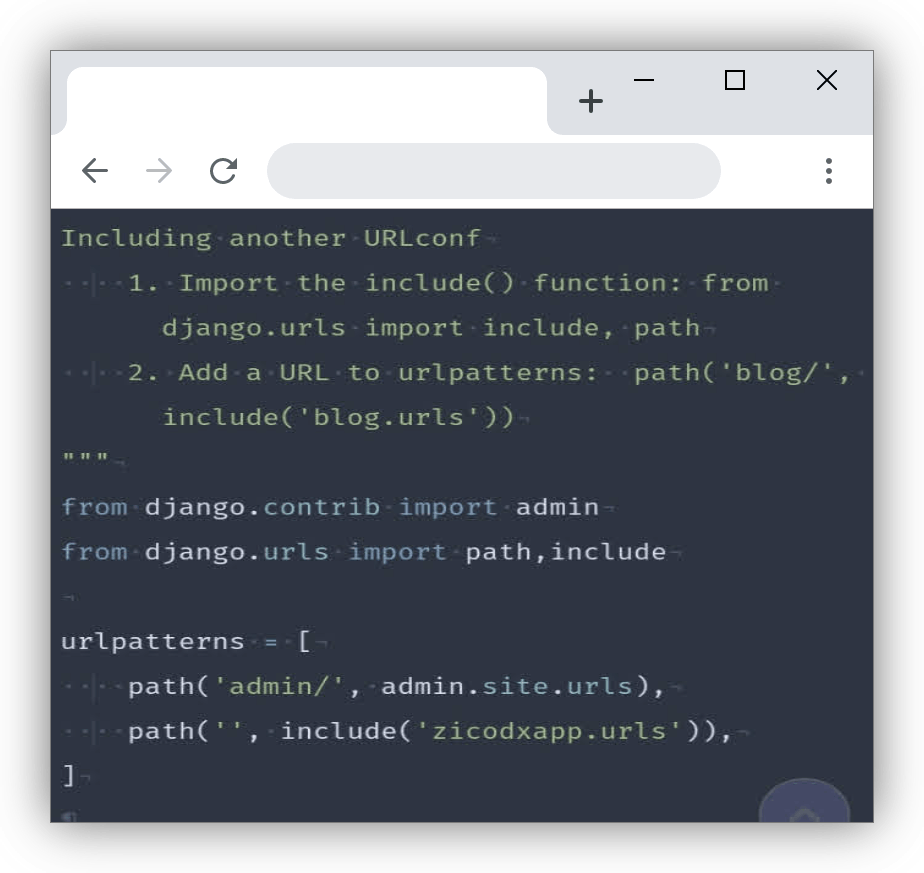
Now, in the same folder where you saw the settings.py file, open the urls.py file there, include the urls for zicodxapp by entering:
from django.urls import path,include

urlpatterns = [
.........................................
 path('', include('zicodxapp.urls'))
]
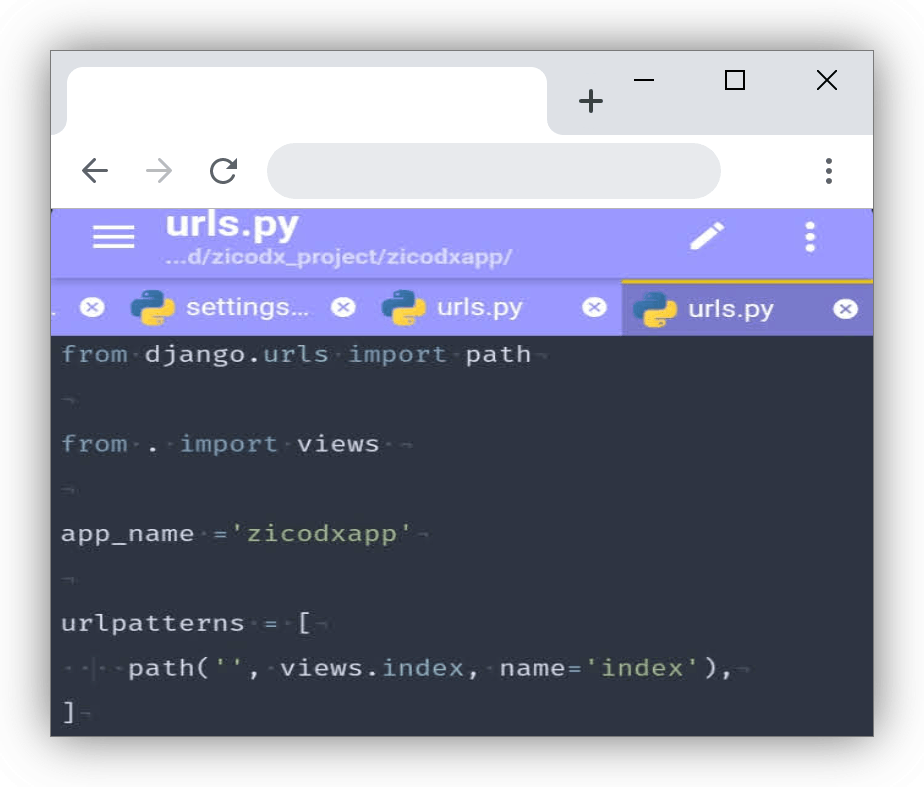
After that, go to the zicodxapp folder and create a new file in it, save it as urls.py. This will be the url patterns file for the zicodxapp. Add these lines of code in it.
from django.urls import path #importing the necessary documents

from . import views

app_name ='zicodxapp'
urlpatterns = [
 path('', views.index, name='index'),
]
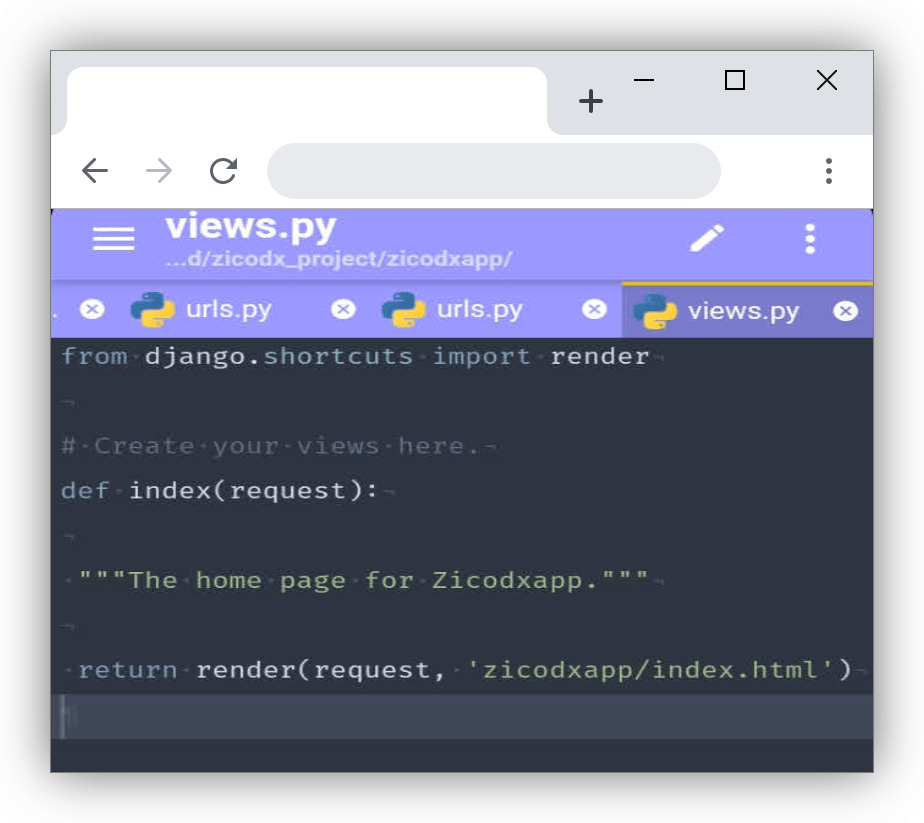
Then, open your views.py file (which is in the same folder where you created your urls.py) and add these lines of code:
from django.shortcuts import render
def index(request):
 """The home page for Zicodxapp.""”

return render(request, 'zicodxapp/index.html’)
Creating a template
Now, you are going to create a template. A template is a html file Django renders on the page you are building. This is the index.html file that you already added in your views.py. To create a template, follow a routine which is, create a folder in your zicodxapp folder and save it as templates, inside the templates, create another folder and save it as zicodxapp, create a file in it and save it as index.html. This is a redundant practice which Django uses when searching for templates. So, make sure you save it like that: zicodx_project/zicodxapp/templates/zicodxapp/index.html
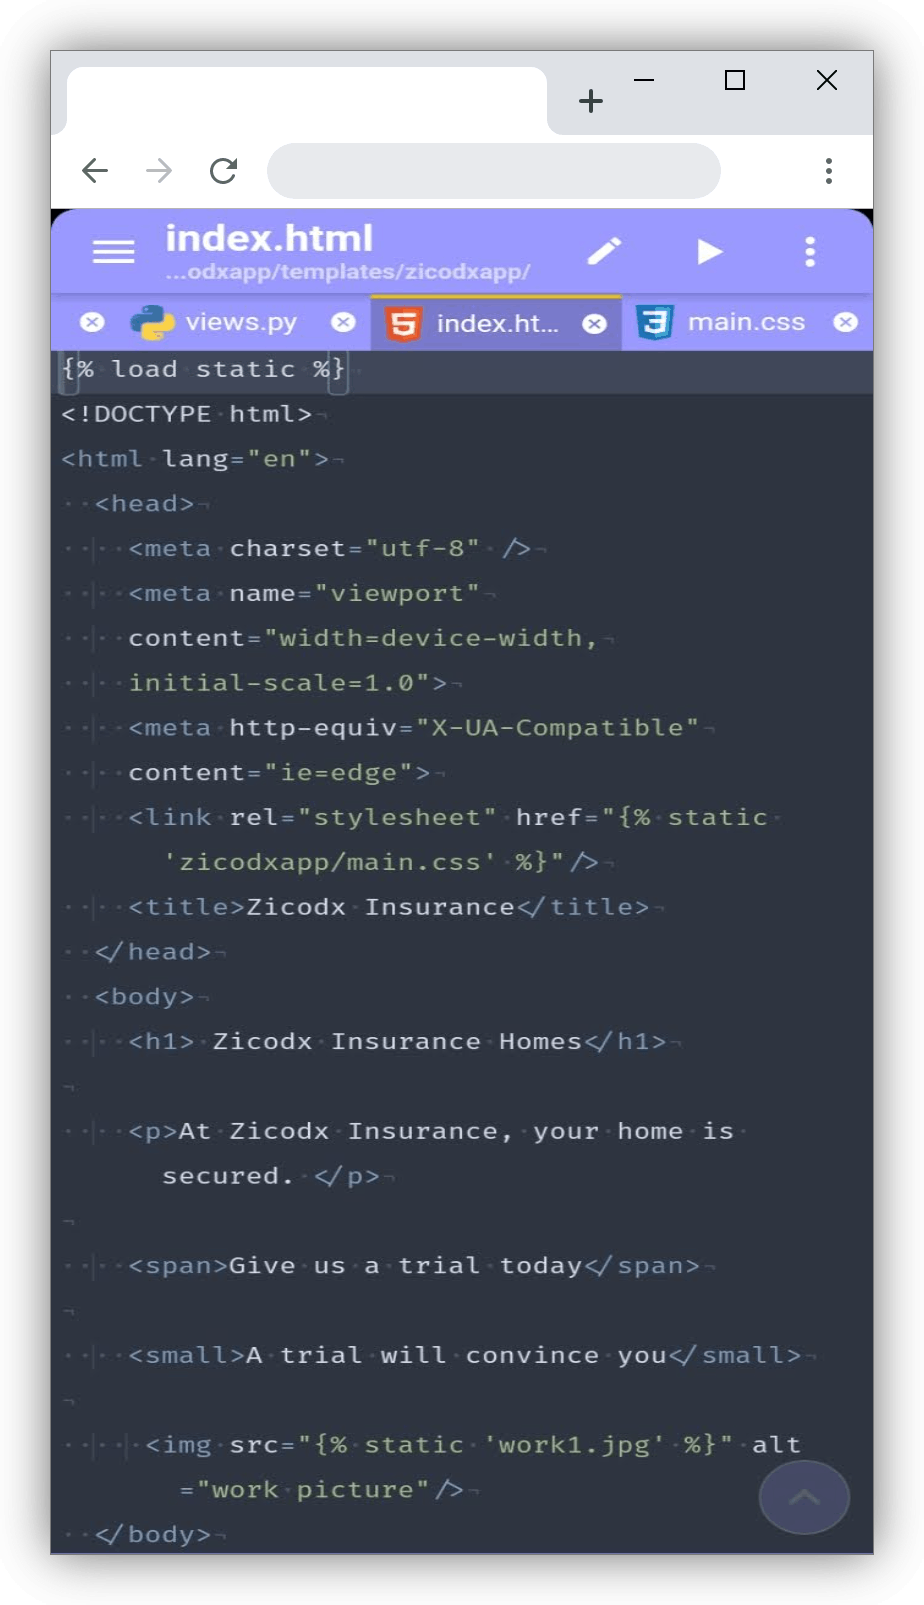
After you are done, open your index.html file and enter this:
{% load static %}
 <!DOCTYPE html>
 <html lang="en">
 <head>
 <meta charset="utf-8" />
 <meta name="viewport"
content="width=device-width,
 initial-scale=1.0">
 <meta http-equiv="X-UA-Compatible"
content="ie=edge">
 <link rel="stylesheet" href="{% static 'zicodxapp/main.css' %}"/>
 <title>Zicodx Insurance</title>
 </head>
 <body>
 <h1> Zicodx Insurance Homes</h1>

<p>At Zicodx Insurance, your home is secured.</p>
 <span>Give us a trial today</span>
 <small>A trial will convince you</small>
 <img src="{% static 'work1.jpg' %}" alt="work picture"/>
 </body>
 </html>
Then, create another folder in your zicodxapp, save it as static. Then create another folder in your static folder, save as zicodxapp, create a new file and save as main.css, which is the .css file that you will link with the index.html. For the image, save it in the static folder directly. The CSS file will be in this structure: zicodx_project/zicodxapp/static/zicodxapp/main.css
The image file will be in this structure: zicodx_project/zicodxapp/static/image.jpg
To see how far you have gone, you can run
python manage.py runserver

Seeing how you have come so far, the next thing is to style the html. Open the main.css file that was saved previously and add this:
html {
 font-size: 62.5%;
 }
body {
 font-size: 1.6rem;
 text-align: center;
 color: #333;
 }
html,body {
 margin: 0;
 padding: 0;
 box-sizing: border-box;
 }
img {
 max-width: 100%;
 display: flex;
 justify-content: center;
 }
h1 {
 text-align: center;
 font-size: 35px;
 color: #596185;
 }
 small {
 color: #ff4040;
 }
After adding the CSS, you can check your progress by entering:
python manage.py runserver
You should see something like this.
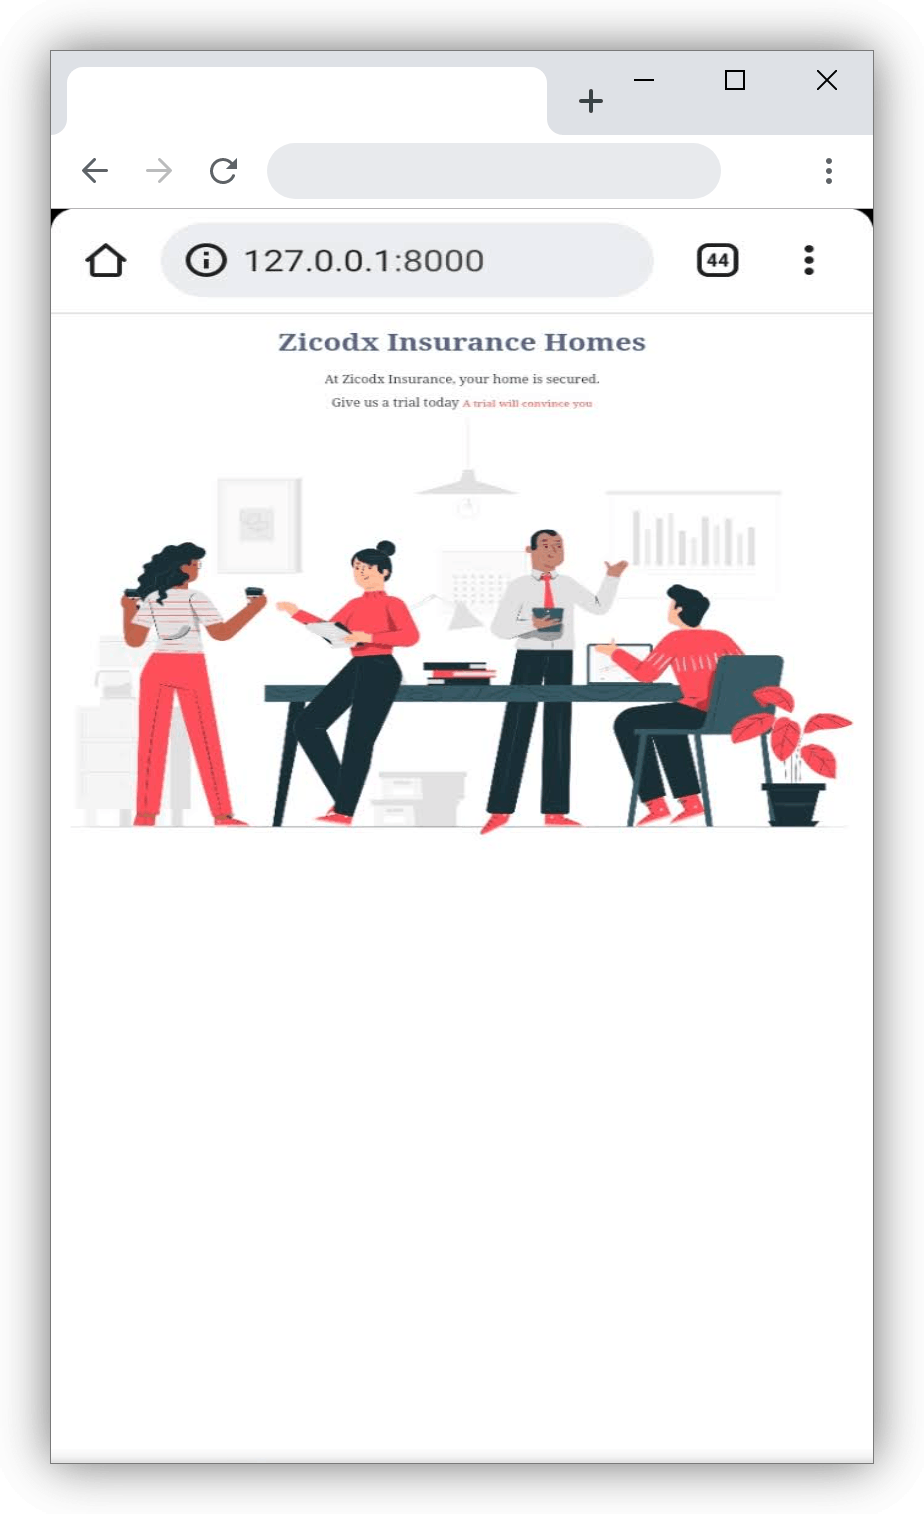
Now, you have styled the page completely. It is time to push the code to GitHub.
STEP 3 - PUSHING YOUR CODE TO GITHUB
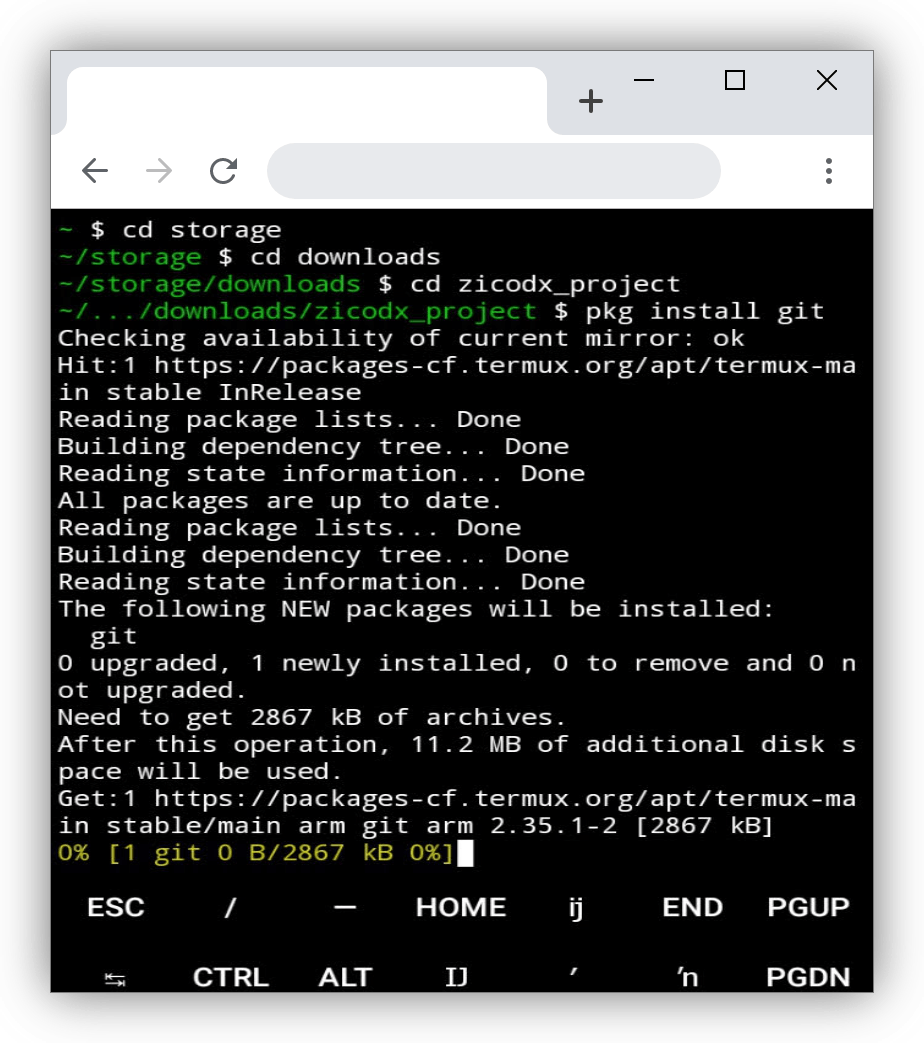
First go to GitHub and create an account, if you haven't. After registration, head back to your Termux app.
Next thing is to install git. So, enter this in the termux app:
pkg install git
After the installation, you need to configure your username and email, so enter this:
git config --global user.name "<username>"

git config --global user.email "email@example.com"
Don't forget to add your name and email in sample quotes above.
Enter:
pip freeze > requirements.txt
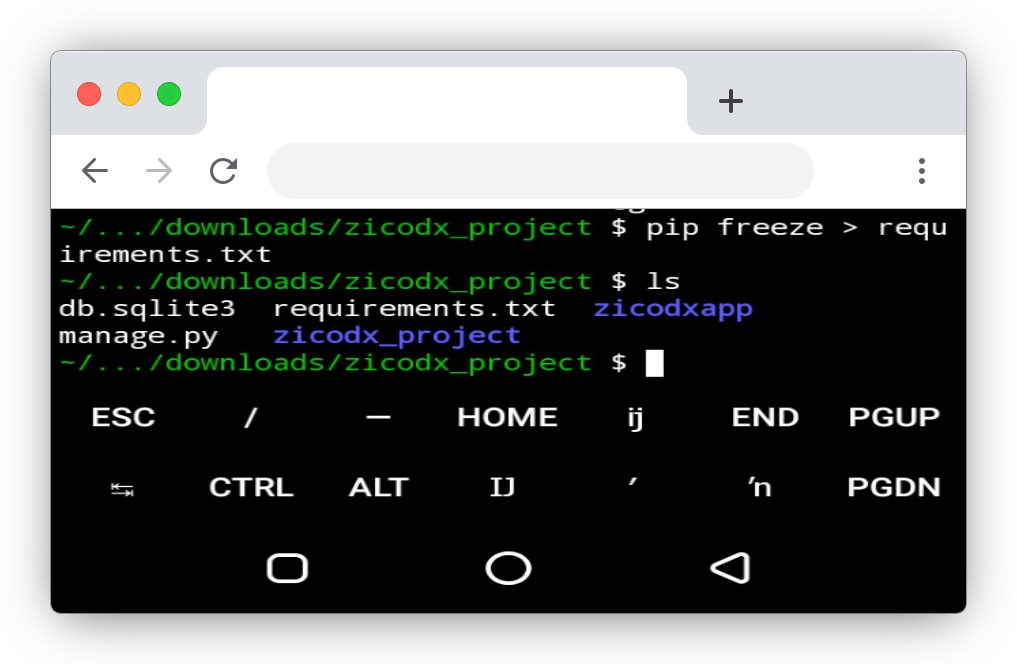
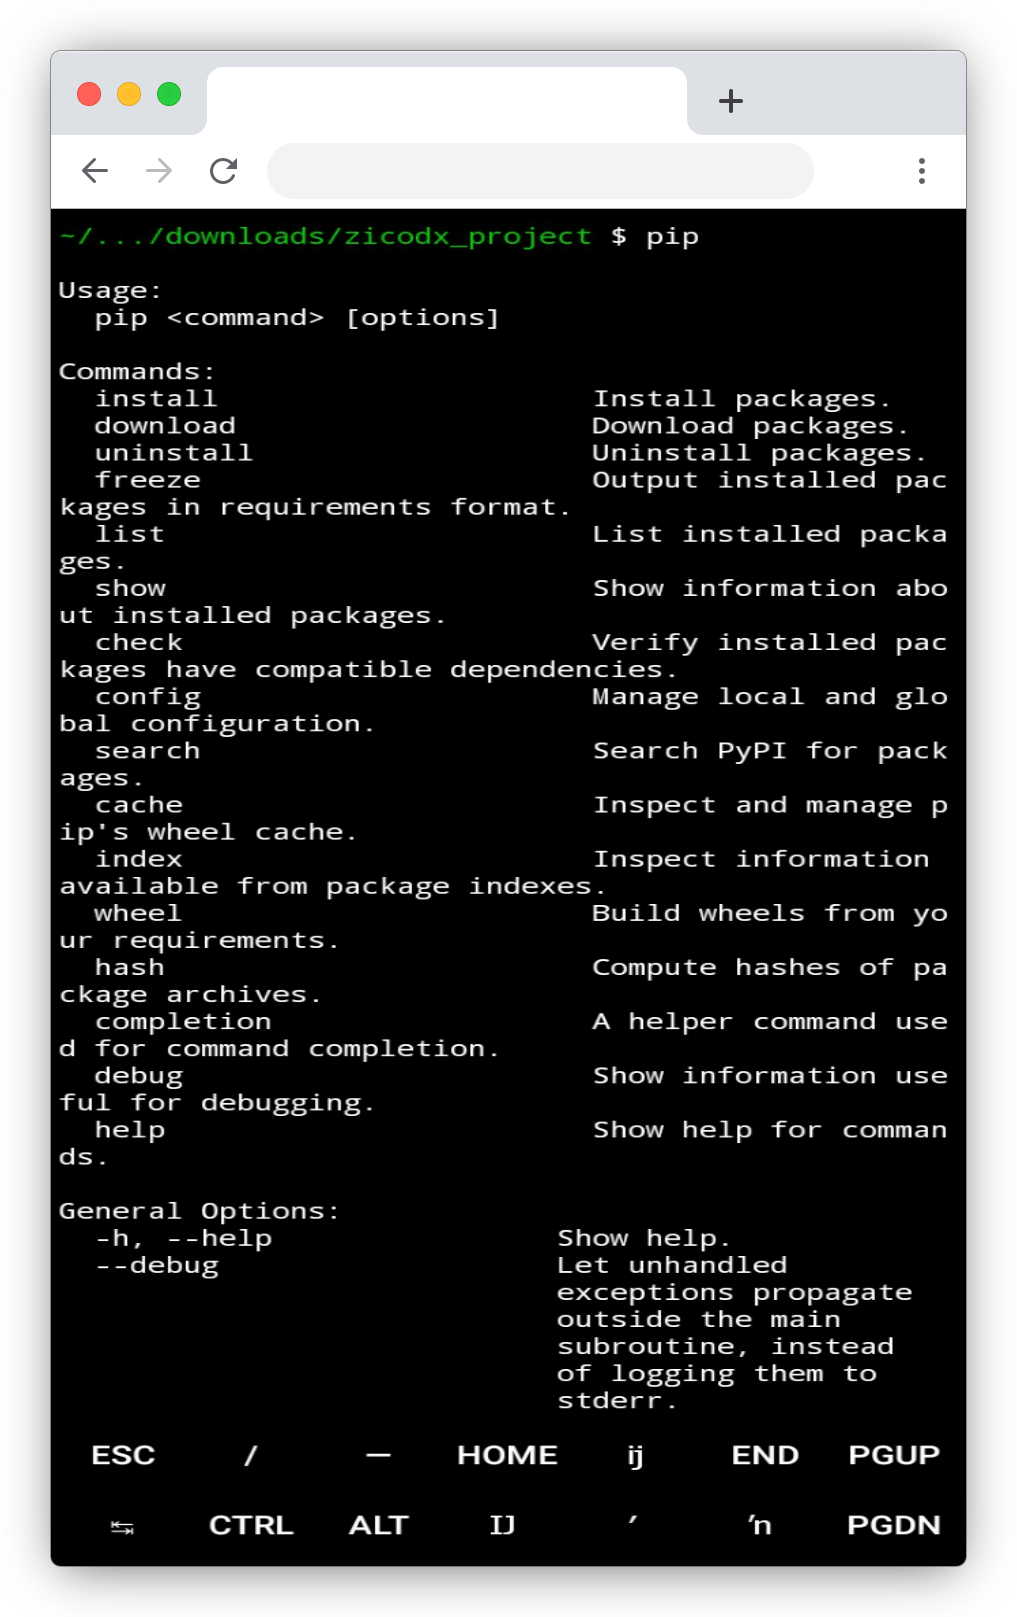
This will output the requirements needed to run the program in a file format. Saved as requirements.txt, if you check your storage, you would see a requirements.txt file saved, if you want to be familiar with all pip commands, you can enter:
pip
And it would showcase all of pip commands
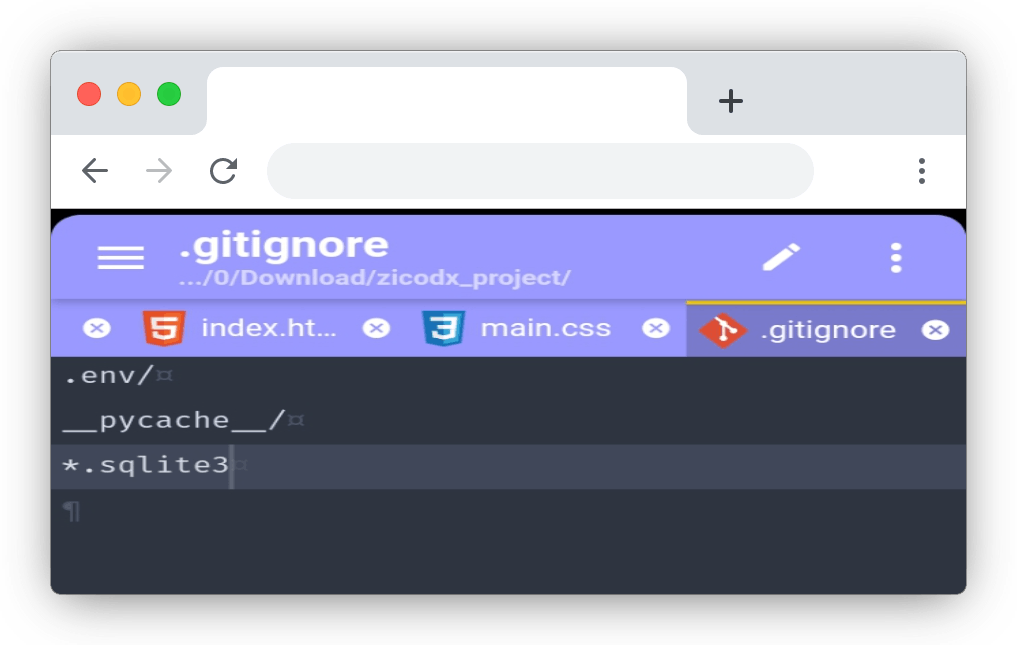
Now, you need to create a .gitignore file, Git normally tracks all the changes made to a program when you initialize it. But there are some folders that you do not need to track their changes like the pycache folder that is created automatically when Django runs the .py files, Git should not track the database, and also the .env file where you would hide your secret key.
Save the .gitignore file in the same location as your manage.py file. Then, enter this:
.env/
__pycache__/
*.sqlite3
To create the .env file, create a file in the same location as your manage.py file and .gitignore file, and save it as .env
Then, go to settings.py file to where your secret key is located, cut it out and paste in your .env file like this:
SECRET_KEY = '....your secure key....'
Then in your settings.py, where you had cut the secret key out from. Enter this:
from decouple import config

SECRET_KEY = config('my_key')
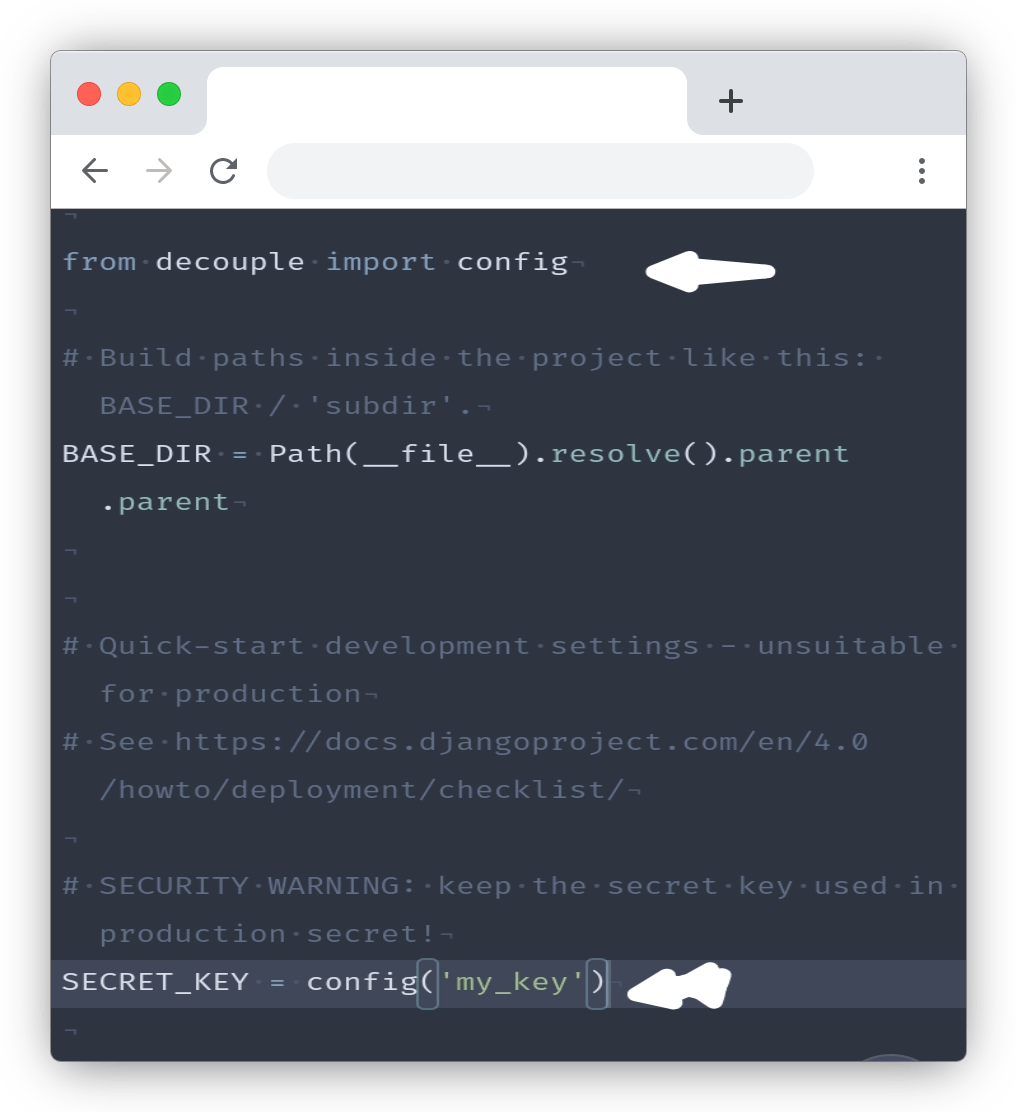
You can use any other word apart from my_key.
After saving it, open your termux, enter:
pip install python-decouple
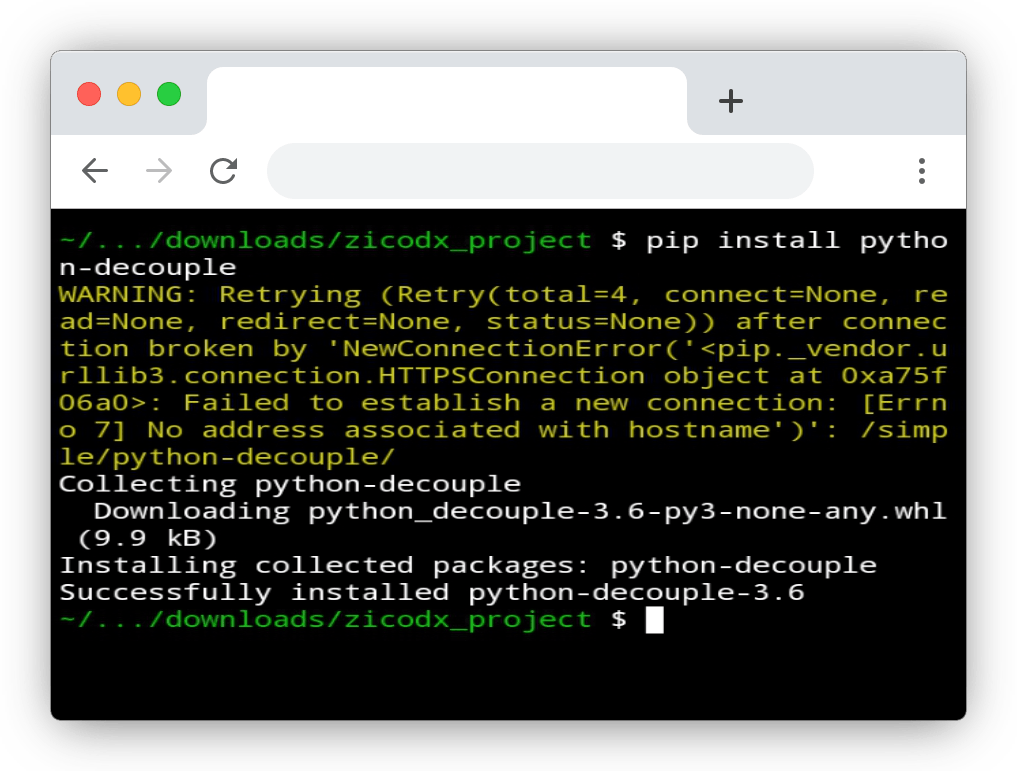
This will install the decouple package in the terminal, which you imported in settings.py
Then, go to your GitHub account, click on the New repository and create a new repository. After choosing a name, click on create a new repository.

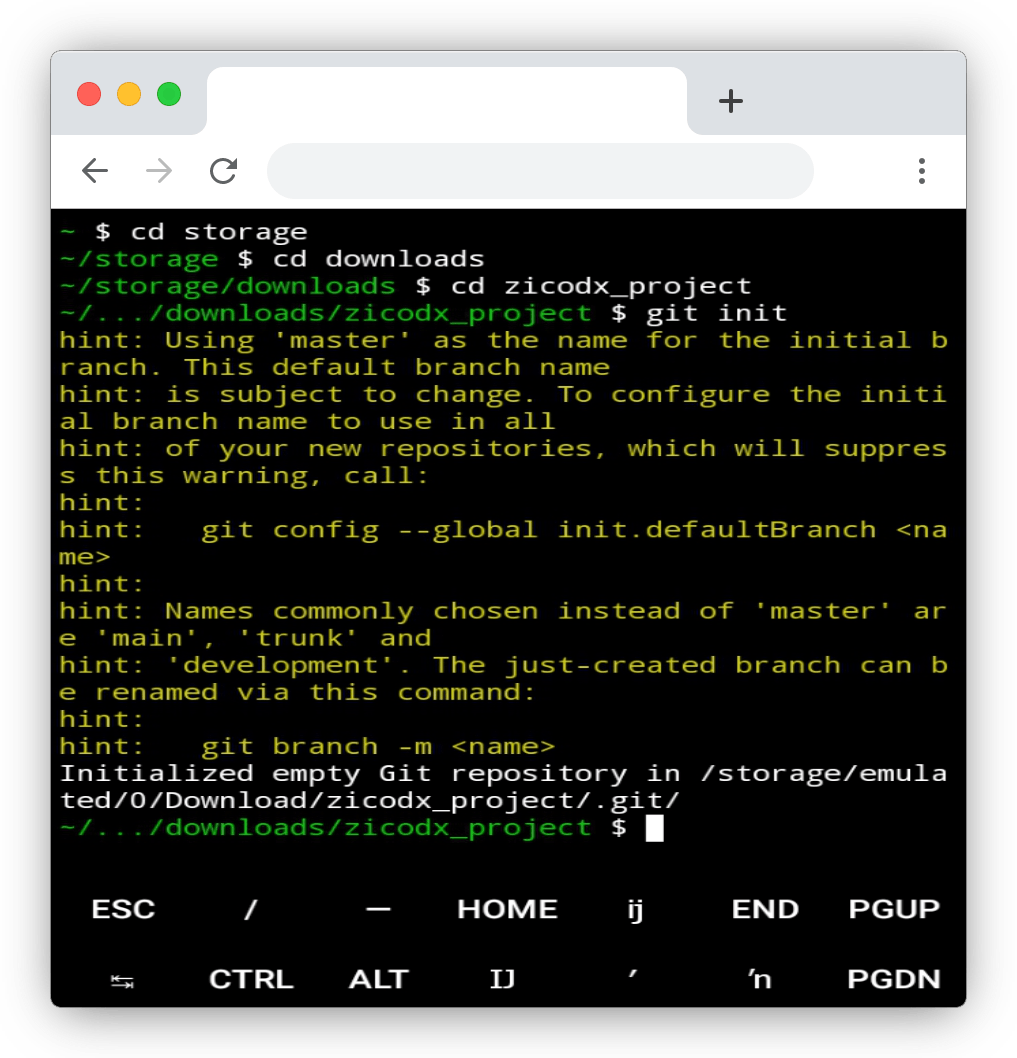
After that, go back to termux and initialize git in your zicodx project by entering:
git init
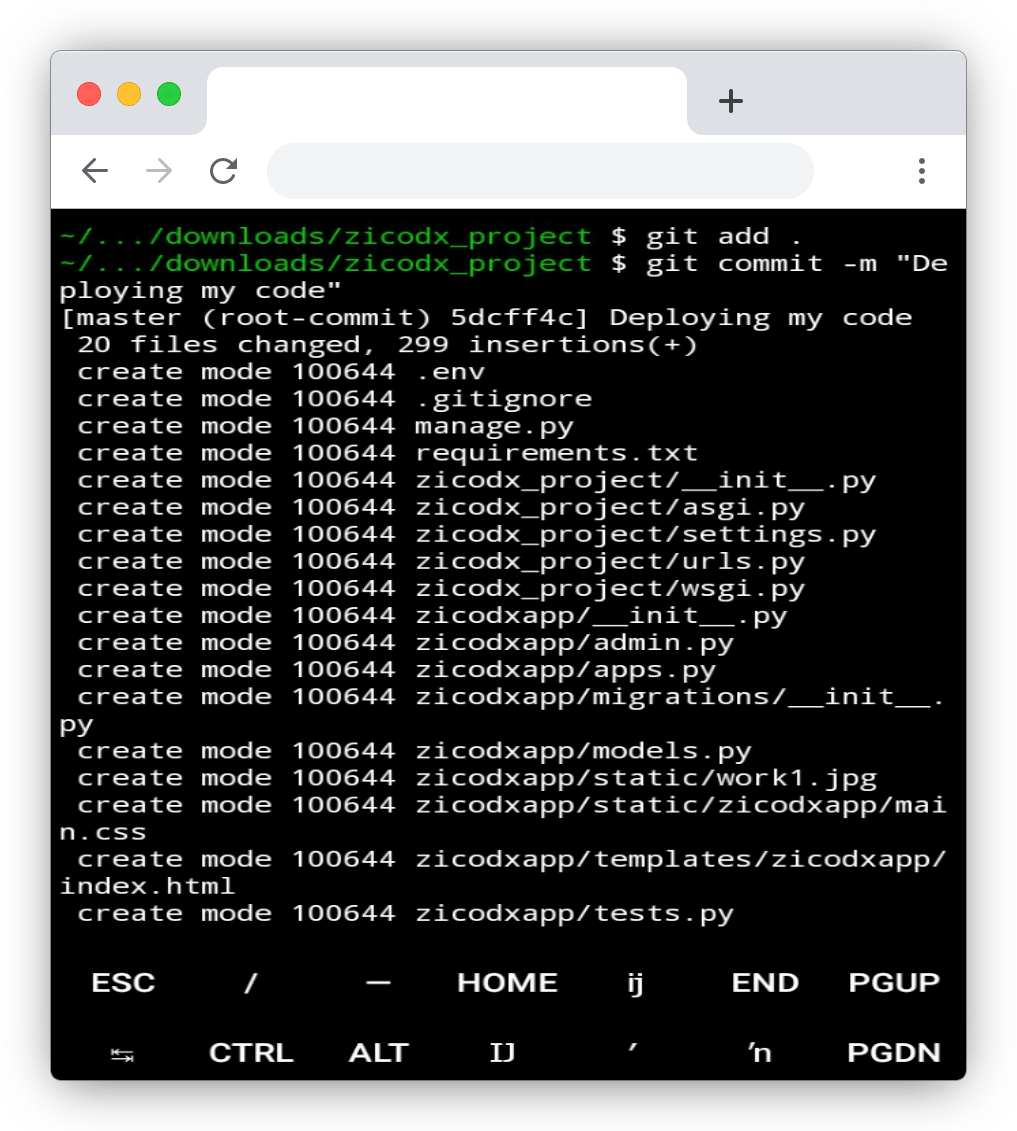
Then enter:
git add . git commit -m "Deploying my code"
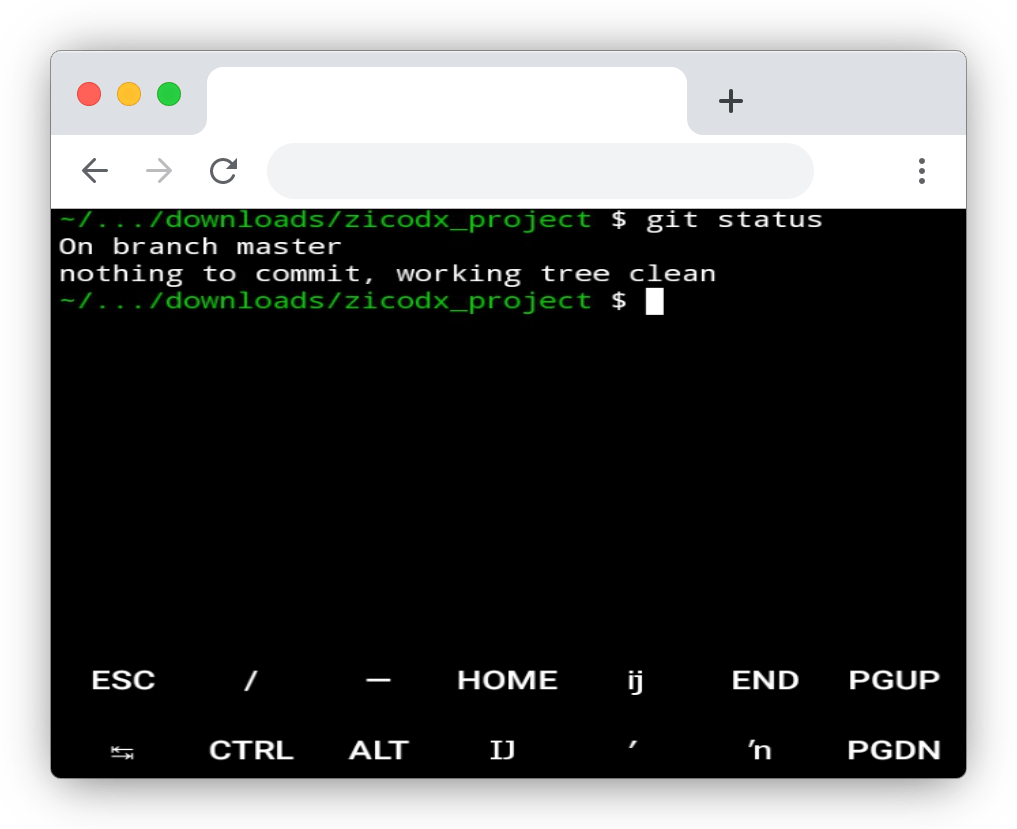
Whenever you want to confirm your progress on Git. Enter this to the terminal:
git status
Go back to GitHub, where you created that repository, and copy the second to last line.
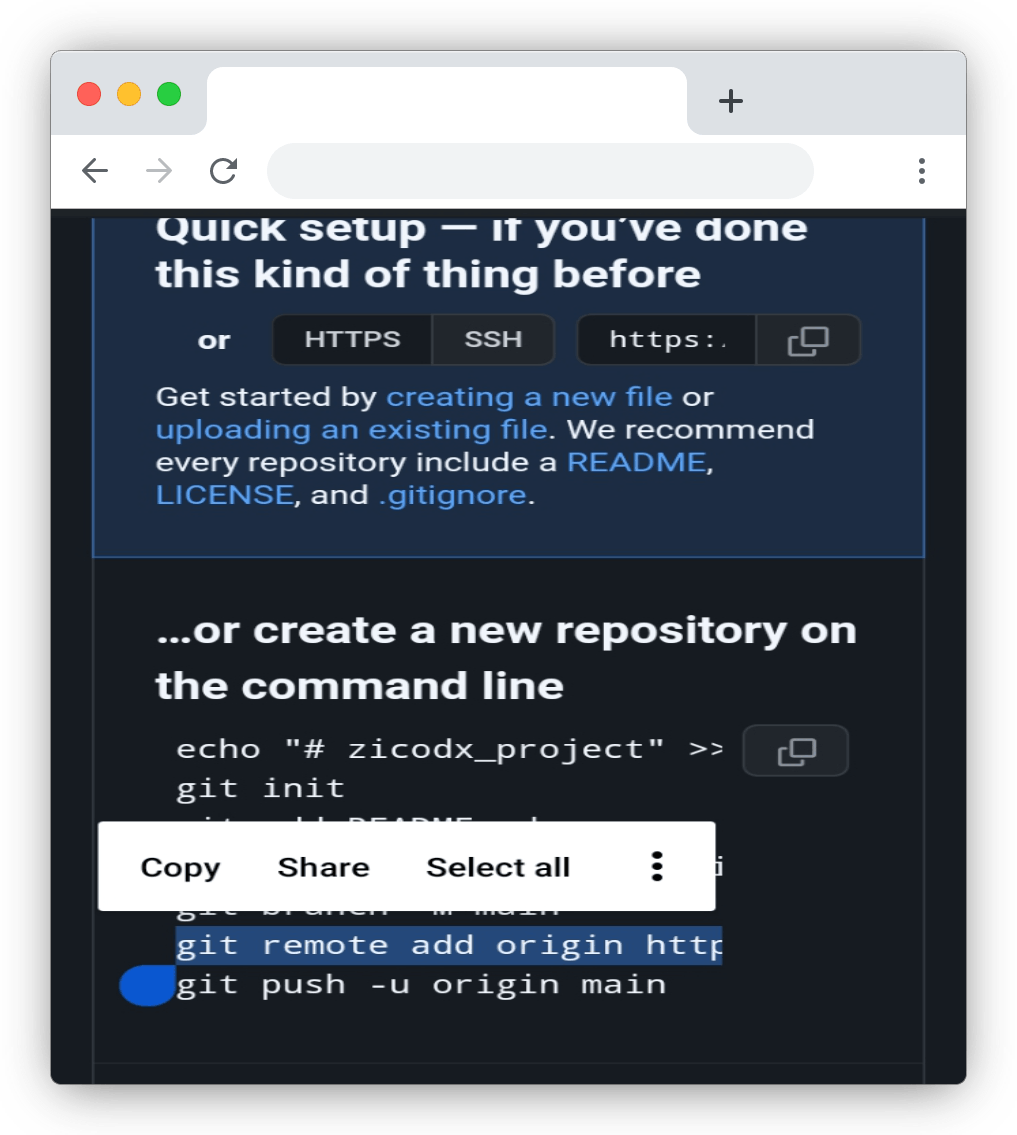
git remote add origin “your repository link"
Paste it in termux and press enter
Then to push your code, enter:
git push -u origin master
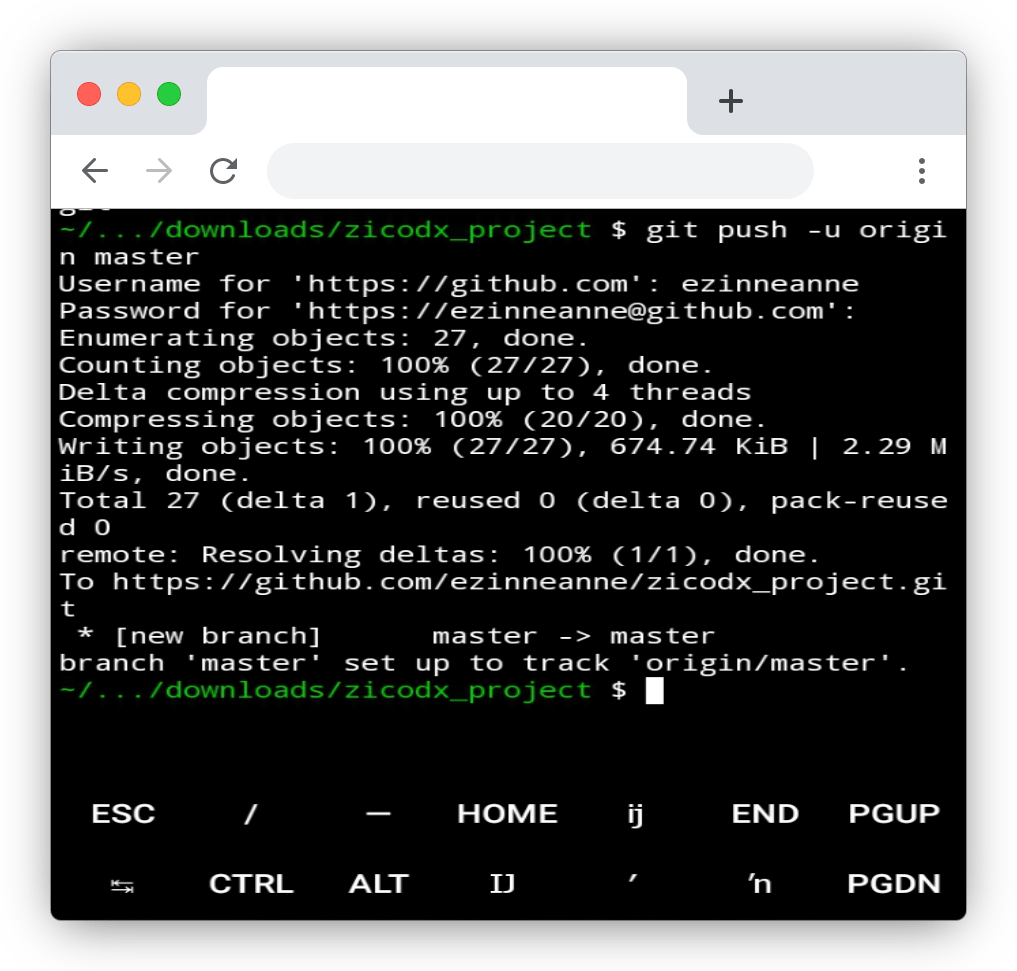
When you press enter, GitHub will prompt you for your name and password. This is a recent feature that was implemented by GitHub last year. Whenever you want to push your code to GitHub from the terminal, you have to identify yourself.
This process differs completely from the initial global config pattern, which is to link your account to your local machine.
Now, when GitHub requests for your username, enter your username. In the place of your password, you would have to generate a token. There are different ways to generate a token. You could use an app or you could use your phone number. You can follow the process here
After you have generated it, add it and press enter.
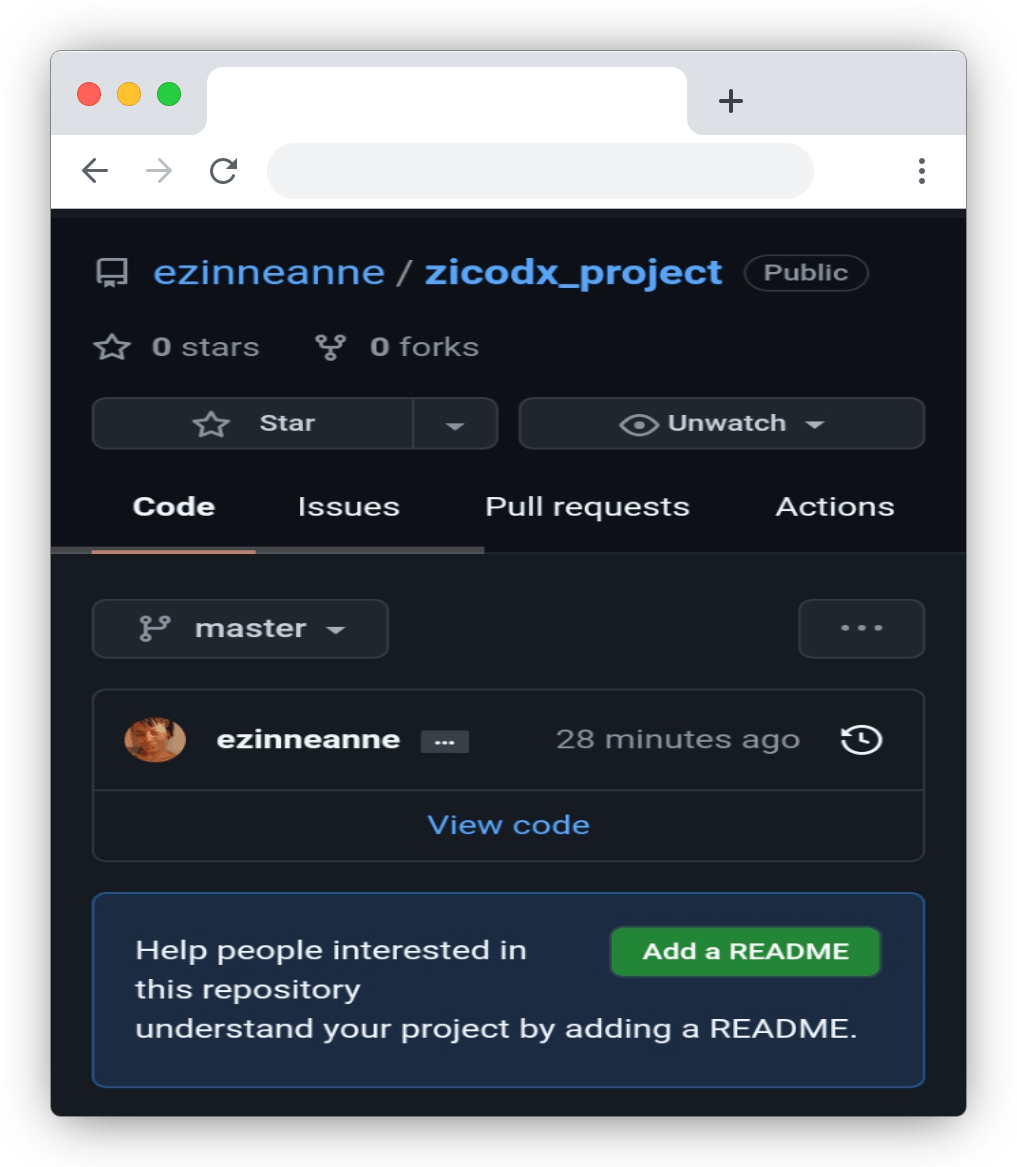
That’s it, go to GitHub, refresh your webpage and confirm the upload.
CONCLUSION
With that, you have learned how to install termux correctly, build a web app using Django and how to install Git and push your code to GitHub with no hassle.
With continuous growth in technology and the resilience of the team maintaining termux, it is now possible to build server-side applications using your mobile phone. No need to wait for a laptop, before you can start learning how to code, you can start right away. Even if you have a laptop and you are used to working with your phone. Then, you can use your phone perfectly. Now, you could add a ReadMe.Md file to your GitHub repository and try out other features as well.